Django MySQL: Insert Validated Form Data
Recommended preparation: set up a Django project and read the Django tutorial overview before trying the code.
Save student input to MySQL through a Django ModelForm. This example continues the Student model introduced in the database setup tutorial and uses POST, CSRF protection, validation and a redirect after success.
students/views.py — safe create view
from django.shortcuts import redirect, render
from .forms import StudentForm
def student_add(request):
form = StudentForm(request.POST if request.method == "POST" else None)
if request.method == "POST" and form.is_valid():
form.save()
return redirect("students:list")
return render(request, "students/student_form.html", {"form": form})The view binds the form to submitted values only for POST requests. Invalid data returns the same page with error messages; valid data is saved once and the browser is redirected to the list page. This avoids accidental duplicate inserts on refresh.
On this page — Show page sectionsHide page sections
Required model and database setup
First complete Django MySQL configuration and create the Student table through migrations. The Student model uses the fields name, cl, mark and gender.
students/models.py
from django.db import models
class Student(models.Model):
name = models.CharField(max_length=100)
cl = models.CharField(max_length=20, db_column="class")
mark = models.PositiveSmallIntegerField()
gender = models.CharField(max_length=20)
def __str__(self):
return self.nameCreate a ModelForm
students/forms.py — validate marks and expected fields
from django import forms
from .models import Student
class StudentForm(forms.ModelForm):
class Meta:
model = Student
fields = ["name", "cl", "mark", "gender"]
widgets = {"mark": forms.NumberInput(attrs={"min": 0, "max": 100})}
def clean_mark(self):
value = self.cleaned_data["mark"]
if value > 100:
raise forms.ValidationError("Enter a mark from 0 to 100.")
return valueUse fields to allow only the intended columns. ModelForm converts the mark field to an integer and enforces model constraints; the clean_mark() method adds a 0–100 domain rule. Never trust raw browser input by passing the entire request.POST dictionary straight into model constructors.
Create the add-student form
students/templates/students/student_form.html
<h1>Add a student</h1>
<form method="post">
{% csrf_token %}
{{ form.as_p }}
<button type="submit">Save</button>
</form>
<a href="{% url 'students:list' %}">View students</a>{% csrf_token %} prevents cross-site request forgery for supported POST forms. The form.as_p helper displays field labels and validation errors, although you can render fields individually when you need custom layout.
Define named URLs
students/urls.py
from django.urls import path
from . import views
app_name = "students"
urlpatterns = [
path("", views.student_list, name="list"),
path("<int:pk>/", views.student_detail, name="detail"),
path("add/", views.student_add, name="add"),
]plus2net_demo/urls.py
from django.contrib import admin
from django.urls import include, path
urlpatterns = [
path("admin/", admin.site.urls),
path("students/", include("students.urls")),
]Display a successful list after insert
students/views.py — a list view used after the redirect
from django.shortcuts import render
from .models import Student
def student_list(request):
students = Student.objects.order_by("id")
return render(request, "students/student_list.html", {"students": students})students/templates/students/student_list.html
<h1>Students</h1>
<ul>
{% for student in students %}
<li><a href="{% url 'students:detail' student.pk %}">{{ student.name }}</a> ({{ student.mark }})</li>
{% empty %}
<li>No students have been added yet.</li>
{% endfor %}
</ul>Check the inserted record
Open the Django shell
python manage.py shellInspect the most recently created student
from students.models import Student
last_row = Student.objects.order_by("-id").first()
if last_row is not None:
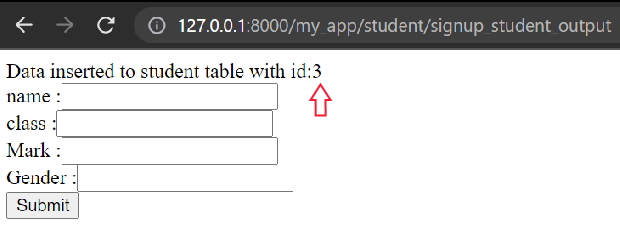
print(last_row.id, last_row.name, last_row.cl, last_row.mark)Django supplies an automatically generated primary key, so you do not need to compute the next ID. If you need to display it after saving, store the return value of form.save() in student and use student.pk.
Why validate POST data before saving?
Assigning unvalidated fields directly from request.POST.get() can fail on invalid integer input and makes user-facing errors harder to display. ModelForm converts values and makes permitted fields explicit. The model also uses db_column="class" when mapping the cl attribute to a SQL column named class.
Common insert problems
- CSRF 403: make sure the form includes
{% csrf_token %}and uses POST. - NOT NULL or integrity error: use valid required fields and review model constraints.
- ValueError for mark: let the form validate the integer and show its errors.
- Table does not exist: check
makemigrationsandmigrate. - Duplicate records after refresh: use POST/Redirect/GET rather than rendering the submitted form after saving.
For related concepts, see reserved keywords in Python, MySQL AUTO_INCREMENT, string conversion and displaying inserted rows.
Further insert and validation examples
Insert directly through the ORM in the Django shell
from students.models import Student
student = Student.objects.create(
name="Krish Star", cl="Four", mark=60, gender="female"
)
print(student.pk)Explicit model validation before calling save()
student = Student(name="Alex John", cl="Four", mark=55, gender="male")
student.full_clean()  # Validate fields and model constraints
student.save()
POST/GET branches inside a Django view
if request.method == "POST":
form = StudentForm(request.POST)
if form.is_valid():
saved_student = form.save()
print("Saved primary key:", saved_student.pk)
else:
form = StudentForm()Explicit form-field error rendering
{% for field in form %}
<p>{{ field.label_tag }} {{ field }}</p>
{% for error in field.errors %}
<p role="alert">{{ error }}</p>
{% endfor %}
{% endfor %}View fragment: status message and redirect
from django.contrib import messages
from django.shortcuts import redirect
def saved_notice(request):
messages.success(request, "Student created successfully")
return redirect("students:list")For a redirect that returns to the new record, you can use redirect("students:detail", pk=saved_student.pk) if the detail route is configured. The list and detail lesson explains that route.


Frequently asked questions
Do I have to write SQL INSERT statements?
No. form.save() and Student.objects.create() use the Django ORM to generate database operations.
Does CSRF protection validate all input?
No. CSRF tokens protect request origin; form field validation checks submitted values.
How do I show the newly created ID?
Assign the object returned by form.save() to a variable and read its pk attribute after saving.
Related Django tutorials
Previous: MySQL connection and models
Next: Insert multiple records
Browse the complete Django tutorial series.
Additional references

Subhendu Mohapatra
Author & Instructor at plus2net
I write and maintain practical tutorials on Python, PHP, SQL, JavaScript, HTML, jQuery, and web development at plus2net. The tutorials focus on clear explanations, working examples, and code that readers can test and adapt while learning.


Subscribe to our YouTube Channel here

22-01-2023 | |
| Hi, I've wll executed all what you taught in your tutorial, I am having some errors that tell me my db_table = 'user' name is not defined. What to do ? | |
 Python Video Tutorials