Install Django and Create Your First Project
Install Django inside a virtual environment, start a new project, add an application and connect a URL to a simple view. The example below uses a local development server and the Django 5.2 LTS release line.
Terminal: create a virtual environment, install Django, and run the server
python -m venv .venv
# Activate the environment before installing Django
python -m pip install "Django>=5.2,<5.3"
django-admin startproject plus2net_demo
cd plus2net_demo
python manage.py runserverThe Python executable used for python -m venv must be a supported version. On Windows activate with .venv\Scripts\activate; on macOS/Linux use source .venv/bin/activate. Start the server from the directory containing manage.py.
On this page — Show page sectionsHide page sections
Prerequisites and a supported version
- Python 3.10 or newer, using a Python release supported by your chosen Django 5.2 patch version.
- A terminal and editor; VS Code or another Python-capable editor is suitable.
- A browser to open the local
127.0.0.1:8000address. - No database server is needed for the initial project because Django configures SQLite automatically.
Check Python, pip and installed Django versions
python --version
python -m pip --version
python -m django --version
Activate the virtual environment
Use a virtual environment to keep Django and package versions separate from other Python applications. The old virtualenvwrapper-win/mkvirtualenv commands are optional tools; Python’s built-in venv is sufficient for this tutorial.
Choose the one activation command that matches your operating system
# Windows Command Prompt
.venv\Scripts\activate.bat
# Windows PowerShell
.venv\Scripts\Activate.ps1
# macOS / Linux
source .venv/bin/activateCreate a project and first application
Run from the active virtual environment
django-admin startproject plus2net_demo
cd plus2net_demo
python manage.py startapp my_app
The project package contains settings.py, urls.py, asgi.py and wsgi.py. The new application contains views.py, models.py and other modules. The correct CLI command is django-admin with a hyphen, not django admin.
Register the app in settings.py
plus2net_demo/settings.py — add your app to the existing list
INSTALLED_APPS = [
"my_app",
"django.contrib.admin",
"django.contrib.auth",
"django.contrib.contenttypes",
"django.contrib.sessions",
"django.contrib.messages",
"django.contrib.staticfiles",
]Create the first view
my_app/views.py
from django.http import HttpResponse
def index(request):
return HttpResponse("Hello, welcome to Plus2Net Django")Connect URLs to the view
my_app/urls.py — create this file
from django.urls import path
from . import views
urlpatterns = [
path("", views.index, name="home"),
]plus2net_demo/urls.py
from django.contrib import admin
from django.urls import include, path
urlpatterns = [
path("admin/", admin.site.urls),
path("my_app/", include("my_app.urls")),
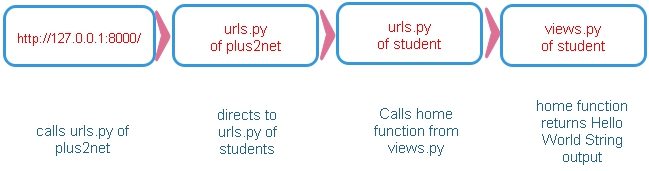
]Navigate to http://127.0.0.1:8000/my_app/. The page should display the string returned from HttpResponse. This is the same view/URL routing workflow used by the forms and database lessons.
Render an HTML template
my_app/views.py — replace the earlier index function
from django.shortcuts import render
def index(request):
return render(request, "my_app/home.html", {"site": "Plus2Net"})my_app/templates/my_app/home.html — create folders if needed
<!DOCTYPE html>
<html lang="en">
<head><meta charset="utf-8"><title>Django Home</title></head>
<body>
<h1>Welcome to {{ site }}</h1>
<p>This page is rendered from a Django template.</p>
</body>
</html>With APP_DIRS=True in the default Django template engine configuration, app templates in a templates/ folder are discovered automatically. For a global template directory, configure TEMPLATES[0]["DIRS"] using BASE_DIR / "templates" rather than outdated os.path.join snippets.
Run database migrations and use the admin
Create default tables and an optional local admin user
python manage.py migrate
python manage.py createsuperuser
python manage.py runserver
The admin login URL is http://127.0.0.1:8000/admin/. To manage your own tables, first create a model, then follow Django admin or models and MySQL.
What the key files do
| File | Purpose |
|---|---|
manage.py | Run project commands such as migrate and runserver |
settings.py | Configure applications, templates, databases and security settings |
urls.py | Map browser paths to Django views |
views.py | Read requests and return responses |
models.py | Define database-backed data structures |
templates/ | Store server-rendered HTML pages |
Common installation errors
- django-admin not found: activate the virtual environment and use
python -m djangoor reinstall Django within the environment. - manage.py not found: change into the outer project folder.
- Port 8000 in use: run
python manage.py runserver 8001. - TemplateDoesNotExist: check the app template folder and
INSTALLED_APPS. - 404 at /my_app/: check that the project URL configuration includes
my_app.urls.
More setup tasks to try on your own computer
Use a separate port when port 8000 is busy
Run the development server on port 8001
python manage.py runserver 8001Then visit http://127.0.0.1:8001/my_app/. Changing the port does not change the URL routes inside your application.
Run the Django system checks
Check configuration and model definitions
python manage.py checkSee the current migrations
List applied and unapplied migrations
python manage.py showmigrationsList management commands
Built-in help for project commands
python manage.py helpDisplay the installed Django version
Check the selected Python interpreter’s Django release
python -m django --versionCreate project files in the current folder
Dot form: avoid a redundant outer project directory
mkdir my_workspace
cd my_workspace
django-admin startproject my_proj .
The trailing dot tells Django to create manage.py in the current directory rather than creating another outer project directory.
Configure a global template directory
Modern pathlib form for template configuration
# settings.py — after the existing TEMPLATES definition
TEMPLATES[0]["DIRS"] = [BASE_DIR / "templates"]
TEMPLATES[0]["APP_DIRS"] = True
Create the templates directory alongside manage.py. Django still finds app-level templates because APP_DIRS remains true.
Run a simple test
my_app/tests.py — test the earlier named URL
from django.test import SimpleTestCase
from django.urls import reverse
class HomePageTests(SimpleTestCase):
def test_home_page_returns_success(self):
response = self.client.get(reverse("home"))
self.assertEqual(response.status_code, 200)Execute Django tests for installed applications
python manage.py testExit the virtual environment
Return to your system’s normal Python environment
deactivateplus2net_demo as the main project name. The my_proj command is an explicitly marked alternative for a different folder layout.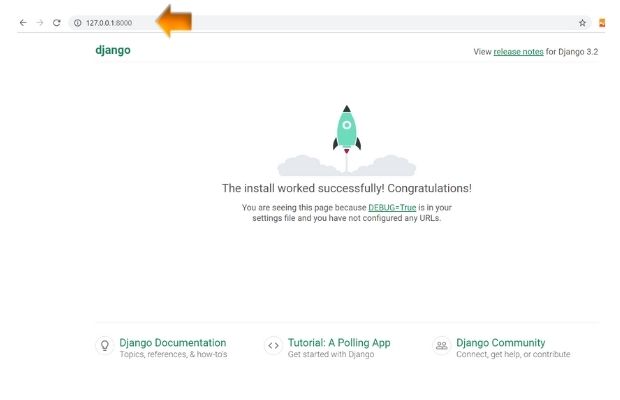
Frequently asked questions
Is Django compatible with Python 3.11?
Yes, Django 5.2 supports Python 3.11. Newer Django 6.x releases require newer Python versions. Follow the official version compatibility table.
Does Django need MySQL to run?
No. A new Django project uses SQLite until you configure another database. MySQL is covered separately in the database lesson.
Can I use runserver in production?
No. It is a development server. Production deployment requires appropriate settings, web server integration, secrets handling and HTTPS.
Related Django tutorials
Previous: Django overview
Next: GET and POST forms
Browse the complete Django tutorial series.
Additional references

Subhendu Mohapatra
Author & Instructor at plus2net
I write and maintain practical tutorials on Python, PHP, SQL, JavaScript, HTML, jQuery, and web development at plus2net. The tutorials focus on clear explanations, working examples, and code that readers can test and adapt while learning.


Subscribe to our YouTube Channel here

 Python Video Tutorials