Python Pillow ImageFilter: Blur, Sharpen and Image Effects
Use Image.filter() with Pillow's ImageFilter module to blur, sharpen or detect edges in an existing image. Open the file, choose a filter and save the result.
from PIL import Image, ImageFilter

with Image.open("cat-filter.jpeg") as img:
    result = img.filter(ImageFilter.GaussianBlur(radius=5))
    result.save("cat-gaussian-blur.jpg")
This example reads a local image, applies Gaussian blur and writes a new JPEG. Replace cat-filter.jpeg with the path to your image. The source is not overwritten.
Install Pillow and understand ImageFilter 🔝
Install the Pillow imaging library in the same Python environment where you will run your script:
python -m pip install PillowPillow keeps the familiar PIL import name. Import Image to open or save images, and ImageFilter for effect definitions. Most filters return a new image; assigning the result to img changes which object the variable references, but does not automatically modify the file on disk.
| Step | Code | What happens |
|---|---|---|
| Open | Image.open(path) | Read image data |
| Filter | img.filter(ImageFilter.BLUR) | Create filtered result |
| Preview | result.show() | Open a temporary preview in an image viewer |
| Save | result.save(output_path) | Write the filtered image to disk |
For a Windows path, use a raw string such as r"E:\testing\images\cat-filter.jpeg", or use pathlib.Path. Keep the output filename different from the source if you want to retain the original.
Full example: choose one image filter 🔝
The original tutorial changes the effect by uncommenting a filter line. Here is the same workflow with a valid path and a clearly labeled active filter. Uncomment just one of the alternatives if you want a different effect.
from PIL import Image, ImageFilter
source = r"E:\testing\images\cat-filter.jpeg"
output = r"E:\testing\images\cat-filtered.jpeg"
with Image.open(source) as img:
# Select ONE filter below:
# result = img.filter(ImageFilter.BLUR)
# result = img.filter(ImageFilter.BoxBlur(radius=10))
# result = img.filter(ImageFilter.GaussianBlur(radius=10))
# result = img.filter(ImageFilter.UnsharpMask(radius=2))
# result = img.filter(ImageFilter.CONTOUR)
# result = img.filter(ImageFilter.DETAIL)
# result = img.filter(ImageFilter.EDGE_ENHANCE)
# result = img.filter(ImageFilter.EDGE_ENHANCE_MORE)
# result = img.filter(ImageFilter.EMBOSS)
# result = img.filter(ImageFilter.FIND_EDGES)
# result = img.filter(ImageFilter.SMOOTH)
# result = img.filter(ImageFilter.SMOOTH_MORE)
result = img.filter(ImageFilter.SHARPEN)
result.save(output)
result.show()Blur filters: BLUR, BoxBlur and GaussianBlur 🔝
Blurring softens transitions between neighboring pixels. This can reduce distracting detail, soften an image background or create a visual effect. The three methods below differ in the amount and character of the blur.
BLUR — built-in blur
ImageFilter.BLUR applies a preset smoothing effect without a configurable radius. It is a quick choice when you need a mild blur.
result = img.filter(ImageFilter.BLUR)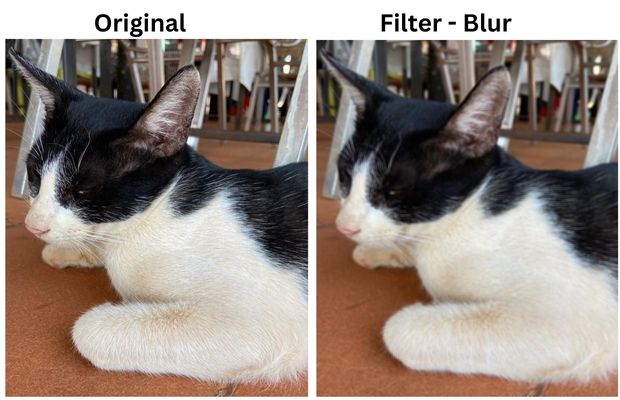
BoxBlur(radius)
BoxBlur replaces each pixel with an average over a surrounding box. Increasing radius makes the image softer; radius=0 has no blur effect. Its radius can be a number or a two-value sequence for horizontal and vertical blur.
result = img.filter(ImageFilter.BoxBlur(radius=10))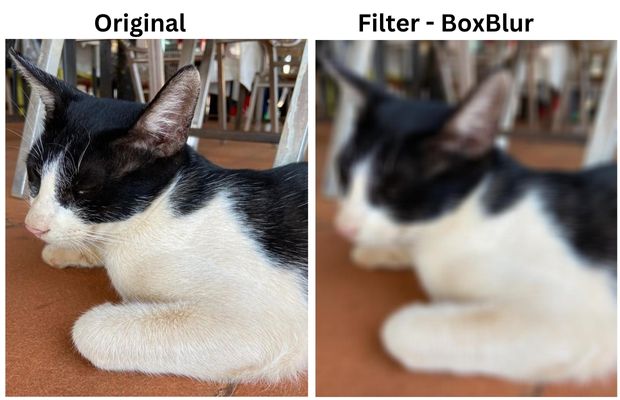
GaussianBlur(radius)
GaussianBlur gives a smooth natural-looking blur. Its radius is the Gaussian standard deviation; a larger value generally produces a stronger effect. Try smaller values for subtle softening and larger values for background blurring.
result = img.filter(ImageFilter.GaussianBlur(radius=10))
| Filter | Parameters | Typical use |
|---|---|---|
BLUR | None | Quick mild softening |
BoxBlur | radius=10 | Strong average-based blur |
GaussianBlur | radius=10 | Smoother-looking softening and background effects |
Sharpen and recover visual detail 🔝
These effects emphasize changes between neighboring pixels. They can make edges and textures look more distinct, but increasing sharpening too much can also highlight noise or create halos.
UnsharpMask: control radius, strength and threshold
UnsharpMask is useful when you need more control than the preset SHARPEN filter. radius controls the neighborhood size, percent controls strength, and threshold controls how much a pixel difference must exceed before sharpening is applied.
result = img.filter(ImageFilter.UnsharpMask(radius=10))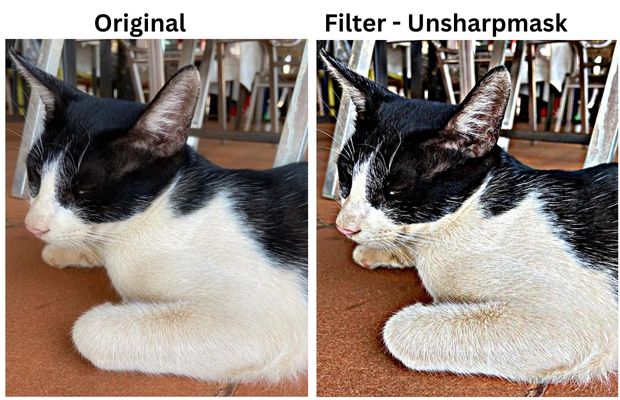
For a more restrained result, start with a smaller radius and tune the other values:
result = img.filter(ImageFilter.UnsharpMask(radius=2, percent=150, threshold=3))DETAIL
DETAIL is a preset enhancement filter that brings out local image detail without requiring parameters.
result = img.filter(ImageFilter.DETAIL)EDGE_ENHANCE and EDGE_ENHANCE_MORE
The first adds modest edge emphasis; EDGE_ENHANCE_MORE produces a stronger effect. Compare both on the same source image before deciding which is useful.
result = img.filter(ImageFilter.EDGE_ENHANCE)result = img.filter(ImageFilter.EDGE_ENHANCE_MORE)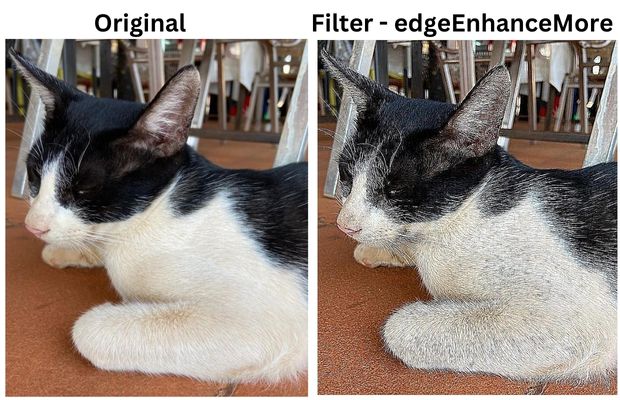
SHARPEN
Use SHARPEN for a quick preset effect with no numeric parameters. For strength and radius control, use UnsharpMask instead.
result = img.filter(ImageFilter.SHARPEN)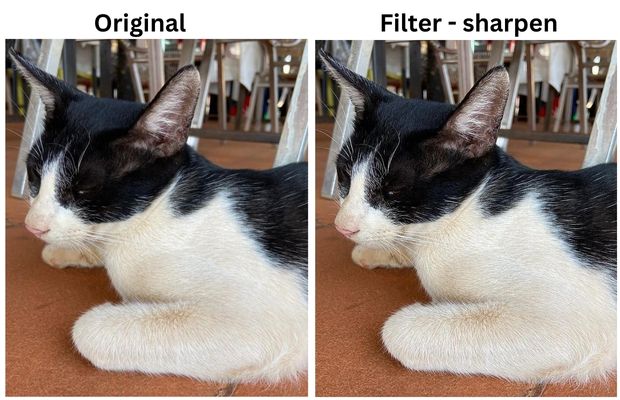
Contour, edge detection and emboss effects 🔝
These effects are useful for stylized outlines or inspecting where tonal changes happen in an image. They are not a substitute for a full computer-vision edge-detection pipeline when accurate measurements are required.
CONTOUR
CONTOUR accentuates transitions to create a contour-like rendition of the source.
result = img.filter(ImageFilter.CONTOUR)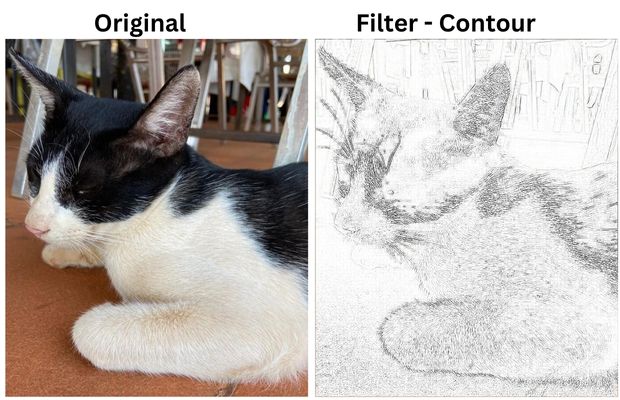
EMBOSS
EMBOSS emphasizes edges in a manner that can make the image resemble a raised or recessed relief.
result = img.filter(ImageFilter.EMBOSS)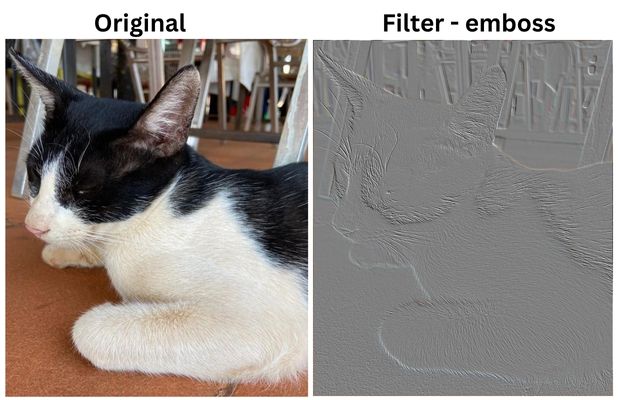
FIND_EDGES
FIND_EDGES highlights boundaries and abrupt changes in brightness. For a clean edge preview, consider converting to grayscale before filtering.
result = img.filter(ImageFilter.FIND_EDGES)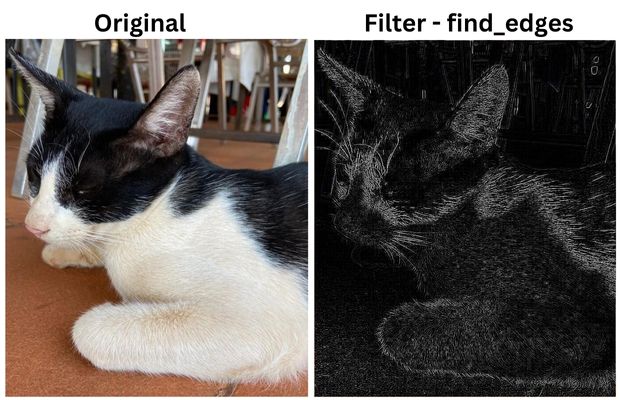
from PIL import Image, ImageFilter

with Image.open("cat-filter.jpeg") as img:
    gray = img.convert("L")
    edges = gray.filter(ImageFilter.FIND_EDGES)
    edges.save("cat-edges.png")
The grayscale conversion in this standalone example makes the edge output easier to inspect as a single-channel image. Save as PNG when you want to avoid another round of lossy JPEG compression.
Smoothing and custom convolution kernels 🔝
SMOOTH and SMOOTH_MORE
These preset filters smooth small pixel variations. Use SMOOTH_MORE for a more noticeable result; neither has a radius argument.
result = img.filter(ImageFilter.SMOOTH)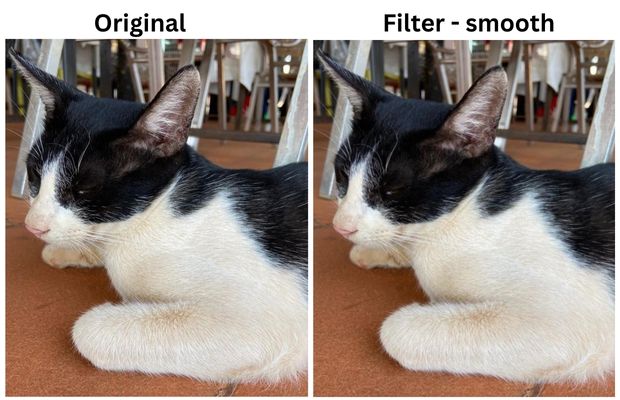
result = img.filter(ImageFilter.SMOOTH_MORE)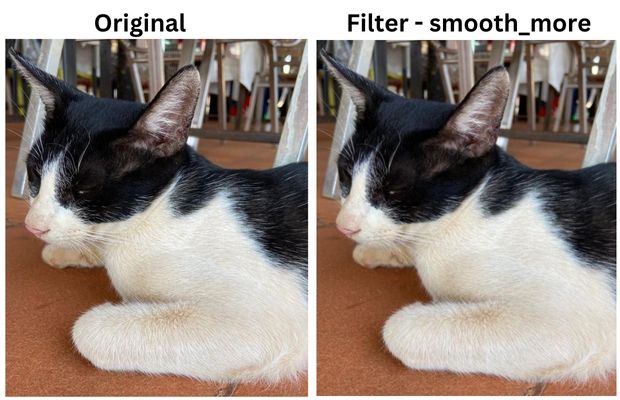
Kernel: make your own 3 × 3 filter
A convolution kernel defines a weight for each position in a small neighborhood. Pillow supports 3 × 3 and 5 × 5 kernels here, and the number of weights must match the kernel dimensions. This valid 3 × 3 example uses nine weights for a simple sharpening effect:
from PIL import Image, ImageFilter
weights = [0, -1, 0,
-1, 5, -1,
0, -1, 0]
with Image.open("cat-filter.jpeg") as img:
result = img.filter(ImageFilter.Kernel((3, 3), weights, scale=1))
result.save("cat-custom-kernel.png")The center weight is positive, while four adjacent weights are negative. That emphasizes local differences. The sum of these weights is 1, so scale=1 is appropriate. Avoid using incomplete lists such as [2, 4] with a 3 × 3 kernel: they do not describe all nine positions. More complex kernels can produce unexpected effects, so test on a copy of the image.
Batch example: save many filter versions from one image 🔝
Instead of changing commented lines and rerunning the file, store filter objects in a dictionary and apply each one to the original image. This makes a convenient side-by-side comparison for a photo or tutorial.
from pathlib import Path
from PIL import Image, ImageFilter
source = Path("cat-filter.jpeg")
output_dir = Path("filtered-output")
output_dir.mkdir(parents=True, exist_ok=True)
filters = {
"blur": ImageFilter.BLUR,
"box-blur": ImageFilter.BoxBlur(radius=5),
"gaussian-blur": ImageFilter.GaussianBlur(radius=5),
"sharpen": ImageFilter.SHARPEN,
"unsharp-mask": ImageFilter.UnsharpMask(radius=2, percent=150),
"contour": ImageFilter.CONTOUR,
"emboss": ImageFilter.EMBOSS,
"find-edges": ImageFilter.FIND_EDGES,
"smooth": ImageFilter.SMOOTH,
}
with Image.open(source) as img:
for label, effect in filters.items():
result = img.filter(effect)
destination = output_dir / f"{source.stem}-{label}.png"
result.save(destination)
print(destination)This script saves each filtered image as a PNG inside filtered-output, leaving the source untouched. It always filters from the original image, not from the result of the preceding filter. The script expects the source file in your current working directory.
Combining filters deliberately
You can also apply filters one after another. Here Gaussian blur first softens the image, then an edge-enhancement filter operates on that softened result. The order changes the outcome.
from PIL import Image, ImageFilter

with Image.open("cat-filter.jpeg") as img:
    softened = img.filter(ImageFilter.GaussianBlur(radius=2))
    combined = softened.filter(ImageFilter.EDGE_ENHANCE)
    combined.save("cat-blurred-enhanced.png")
Common errors and troubleshooting 🔝
| Problem | Likely cause | Fix |
|---|---|---|
ModuleNotFoundError: No module named PIL | Pillow is not installed in the Python environment being used | Run python -m pip install Pillow in that environment |
AttributeError: ... GussianBlur | Method name misspelled | Use ImageFilter.GaussianBlur |
FileNotFoundError | Wrong input path or filename | Check the current directory and use a full path if needed |
| Custom kernel fails | Incorrect kernel size or insufficient weights | Provide 9 weights for 3 × 3 or 25 for 5 × 5 |
| Result looks unchanged | Filter too mild, or saving/displaying original image | Use result.save() and adjust parameters |
| Image colors or transparency lost | Saving transparent RGBA image as JPEG | Use PNG to retain transparency or convert to RGB intentionally |
show() does not display | No available external viewer (often on servers) | Save and open the output file directly |
Frequently asked questions
Does Image.filter() overwrite the original?
No. It returns a filtered image object. The file changes only when you explicitly save to that path.
What is the difference between BLUR and GaussianBlur?BLUR is a fixed preset. GaussianBlur accepts a radius and generally gives a more configurable, smooth blur.
How do I apply multiple filters?
Pass the result of the first filter into the next .filter() call, as in the combined example above.
Which filter is best for sharpening?SHARPEN is quick. UnsharpMask is more adjustable because it accepts radius, percent and threshold.
Can I apply Pillow filters to JPEG and PNG?
Yes, once Pillow can open the image. Be mindful of formats and transparency when saving output.
Does the image size change after filtering?
These filter examples preserve the image's width and height; they modify pixel values, not dimensions. Use Pillow's resize or thumbnail methods if dimensions must change.
What if I want to inspect Pillow's available filters?
Read the official ImageFilter documentation for supported classes and parameters.

Subhendu Mohapatra
Author & Instructor at plus2net
I write and maintain practical tutorials on Python, PHP, SQL, JavaScript, HTML, jQuery, and web development at plus2net. The tutorials focus on clear explanations, working examples, and code that readers can test and adapt while learning.


Subscribe to our YouTube Channel here

 Python Video Tutorials