Move Options Between Two Select Lists with JavaScript
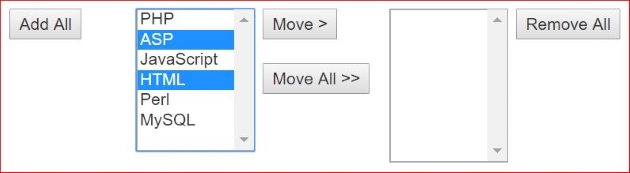
Two multiple-select boxes can provide a clear “available / selected” interface. Modern DOM code can move the actual <option> nodes: appending an existing option to another select automatically removes it from the first.
const source = document.getElementById("available");
const destination = document.getElementById("selected");
Array.from(source.selectedOptions).forEach((option) => {
  destination.append(option);
});Table of Contents
Move Selected Options Top ↑
function moveSelected(source, destination) {
  Array.from(source.selectedOptions).forEach((option) => {
    destination.append(option);
  });
}
This avoids creating a duplicate option and then deleting the original. It also preserves any attributes already on the option.
Move All Options Top ↑
function moveAll(source, destination) {
  Array.from(source.options).forEach((option) => {
    destination.append(option);
  });
}
Move Options Back Top ↑
Use the same functions with the source and destination arguments reversed. This makes one small function reusable for both directions.
moveSelected(selectedList, availableList);
moveAll(selectedList, availableList);
Submitting the Destination List Top ↑
In a multiple select, only selected options are submitted. If every option currently in the destination list should be submitted, select them immediately before form submission.
form.addEventListener("submit", () => {
  Array.from(destination.options).forEach((option) => {
    option.selected = true;
  });
});
How the Original Add-and-Remove Approach Worked Top ↑
The earlier example looped backward, copied each selected option into the second list, and removed it from the first. That demonstrates adding options and removing options, but moving the node directly is simpler for this task.
Related Listbox Tutorials Top ↑
Dependent dropdown lists · Add options · Remove options · Listbox overview · JavaScript validation

Subhendu Mohapatra
Author & Instructor at plus2net
I write and maintain practical tutorials on Python, PHP, SQL, JavaScript, HTML, jQuery, and web development at plus2net. The tutorials focus on clear explanations, working examples, and code that readers can test and adapt while learning.


Subscribe to our YouTube Channel here

| sanjeev | 25-06-2010 |
| nice tutorial i will try | |
| Davor | 31-08-2010 |
| maybe this code below will be better, because value could be ID of item. so second parameter should be text not value. nice tutor btw. addOption(document.drop_list.SubCat, document.drop_list.Category[i].text, document.drop_list.Category[i].value); | |
| amit | 20-04-2014 |
| help me... suppose some data is fetched from database using while(mysql_fetch_array(**) and i want that on click of each fetched data from database one div must be opened up ..please somebody tell me help please | |
| smo | 21-04-2014 |
| You can collect the data and store them inside div tag for each record. Then display when user clicks on it. You can see the demo of FAQ script here.
Or you can send the record id as soon as the user clicks the div tag by using Ajax and return the record details. | |
| smo | 24-04-2014 |
| One script is developed and is available here. How to display record details by user on click | |
| xxx | 30-11-2014 |
| whats "yourpage.php"? | |
| smo | 30-11-2014 |
| To this page all the form data will be submitted. You can change the name. | |